From her sleek ponytail to her bright red lipstick, Maine “Yaya Dub” Mendoza, Eat Bulaga’s golden girl, has set signature looks that turned her into a trendsetter. Remember how they say she caused a certain lipstick variant to get sold out even without direct endorsement? A lot of online stores also use her photos to sell hairstyling products and clothing pieces. Without us realizing it, she is slowly becoming a style icon.
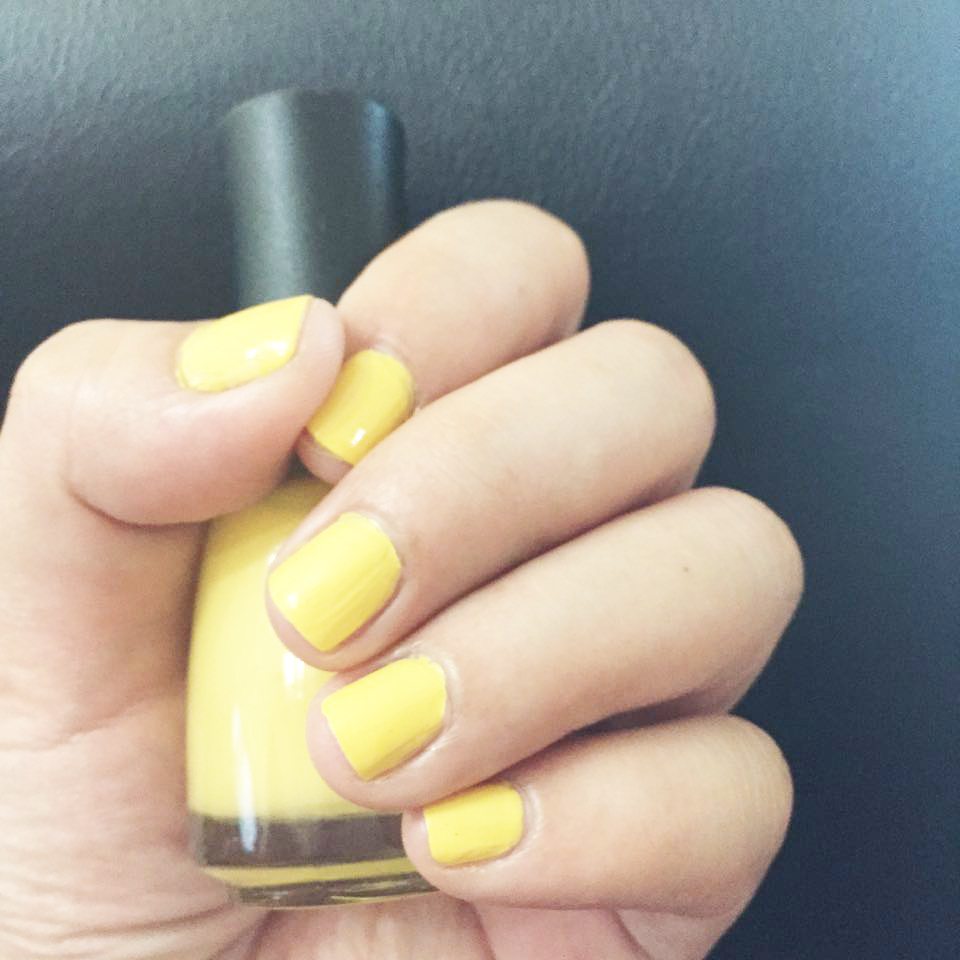
One of Yaya Dub’s trademarks is her perfectly painted nails. I can’t help but notice that each time I get to watch Kalyeserye. You would see her wearing classic colors in earth tones or shades of pink but in two important milestones in the series, she wore her nails in what is known to be her favorite color – yellow. Her nail polish looks shiny and flawlessly applied with the gel manicure effect. Given that a gel manicure (this method that uses a special kind of nail polish that quickly dries up after exposure to UV light promises a chip-free, glossy look to last for weeks!) costs an average of Php600 in the metro, here’s a DIY tutorial you can do at home.
DISCLAIMER: I’m no nail expert so get yourself ready to see a lot of imperfections. To be honest, I was never into nail polish until two months ago when I decided to kick off my bad habit of constant nail biting. 😉 This post is here to share with you my recent nail polish finds.
Please note that this post has not been paid for nor sponsored by any of the mentioned brands.
Yaya Dub’s yellow nails during her dramatic reunion with Alden in last Saturday’s episode #ALDUBStayStrong and during her first time to meet Eat Bulaga’s TVJ last October 3, 2015 (Photos courtesy of T.A.PE. and GMA)
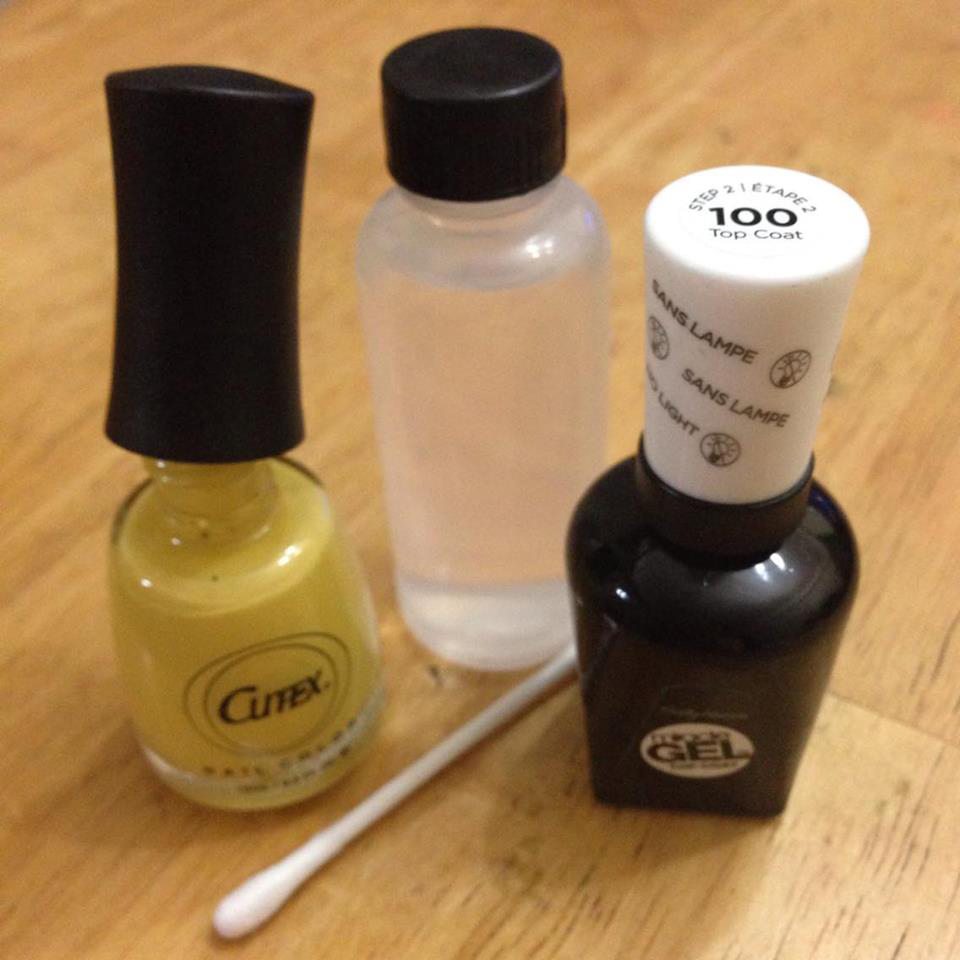
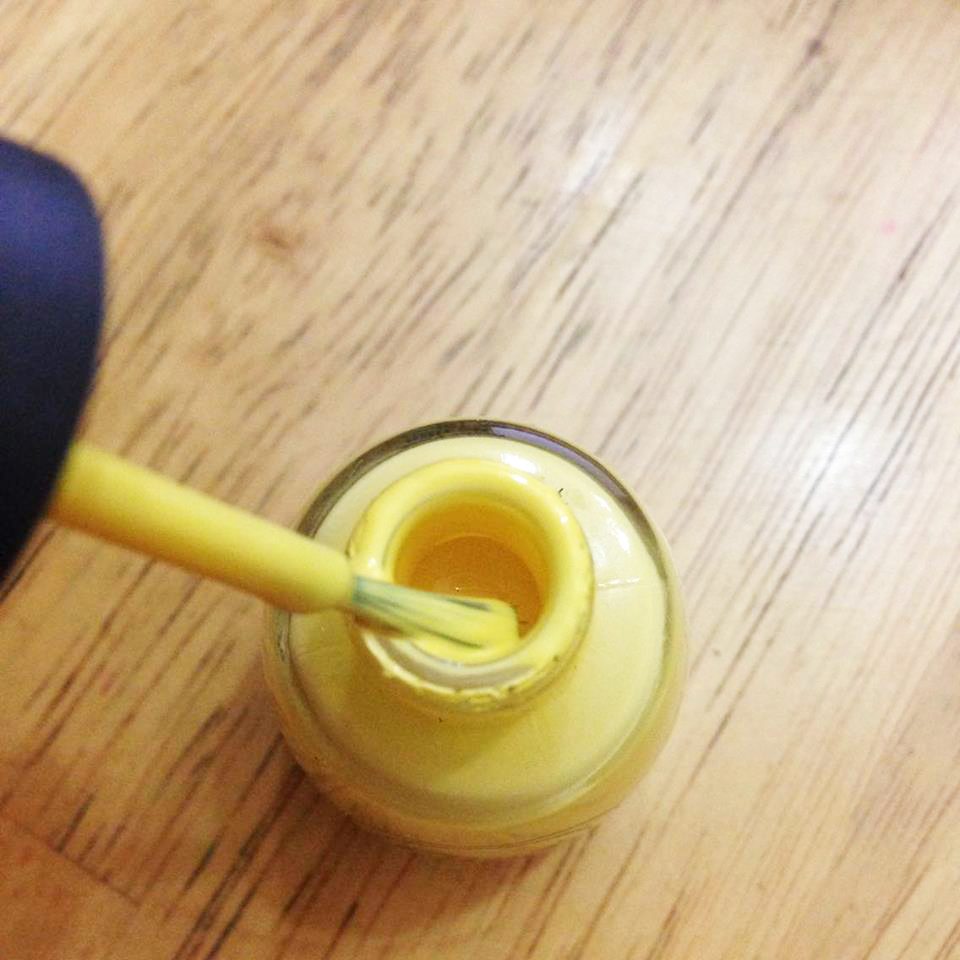
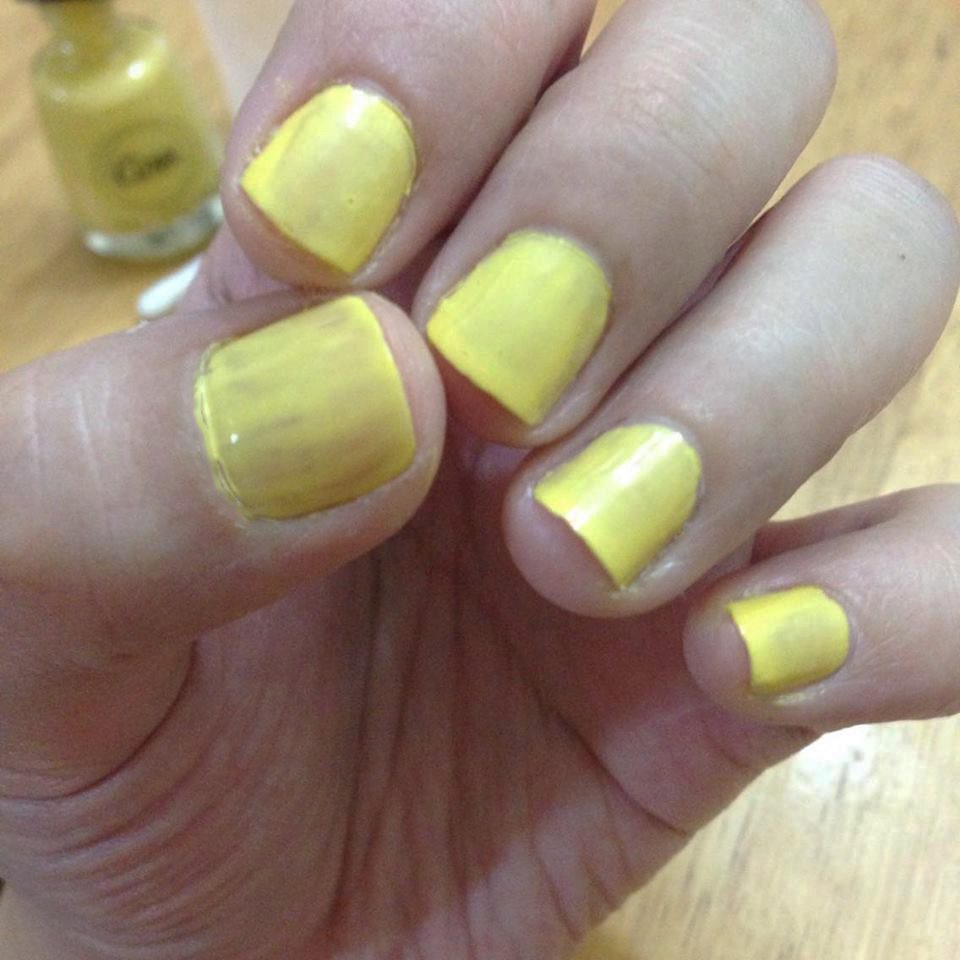
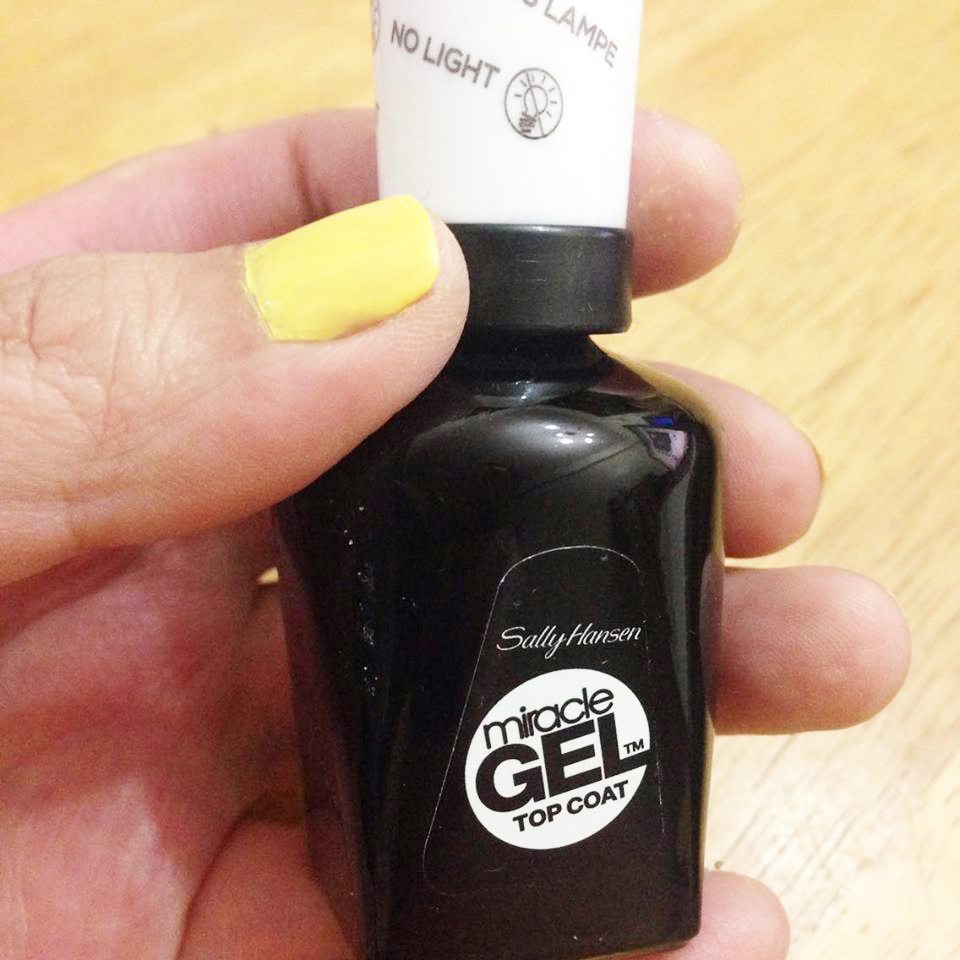
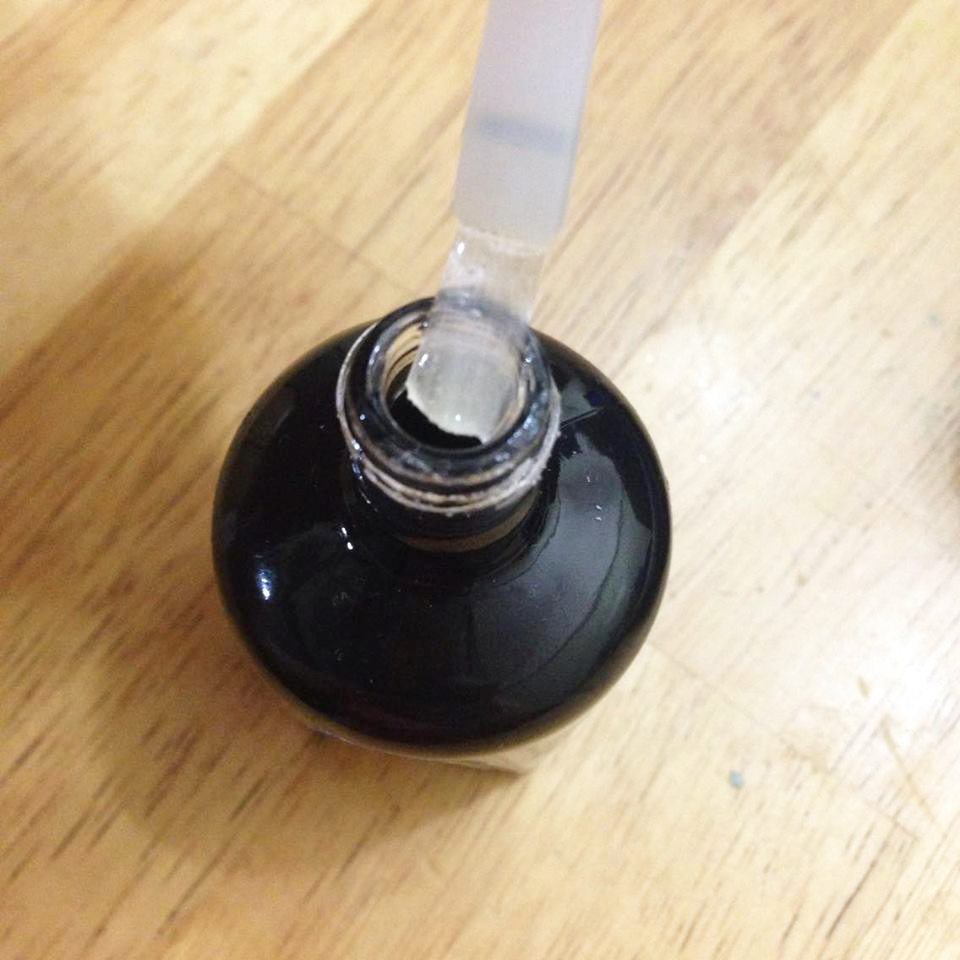
WHAT YOU’LL NEED: 1) light yellow nail polish 2) nail polish remover 3) cotton bud and 4) clear gel coatTo recreate Yaya Dub’s yellow nails, make sure you look for a light banana yellow shade and AVOID ones that are neon or too bright. You wouldn’t want to look like you used a yellow highlighter on your nailsss! SPEND or SAVE: Cutex (Php169) and Bobbie (Php85) have this light banana yellow shade. Other good quality brands that carry the shade but may cost more are Orly and OPI. I got my Cutex bottle from a local drugstore.Check out my imperfectly applied nail polish! 😛 Apply a thin layer of nail polish for your first coating. Never mind that you can still see through your nails. Wait for this application to dry up a bit before moving on to the next step.Once the first layer is dry, carefully apply a second coating. In case during your application the nail polish get smeared beyond your nails, get the cotton bud and add a bit of nail polish remover to it. Use this to spot-correct and erase mistakes.Once the second layer is slightly dry, you can now top it off with a clear gel coat. This is where the magic lies. This particular gel coat does not need the UV light machines found in salons but delivers almost the same quality. To add to that, you can use regular nail polish beneath it.This Sally Hansen bottle may be a bit pricey at Php495 but compared to a one-time gel manicure session at the salon, you can use this several times. Tried and tested, your polish can last up to two weeks! Even if it may last more than that, your nails will surely grow and you wouldn’t want to see unpolished gaps that are almost equivalent to having chipped nail polish. 😉 For a more affordable option, I saw that Cutex has a Php150 variant similar to this. You might want to try it out too!Do-it-yourself yellow gel nails at home!